Looking for unique yet sentimental and wallet-friendly gifts for that someone special? Be it your best friend, family member or significant other, here are two easy-to-do DIY gift ideas that are perfect for any occasion. Grab your scissors and coloured papers. Let’s get crafty!
PULL-OUT PHOTO BOX
Here’s what you need:
- A Wooden box
- Printed pictures (about 5 to 7)
- Cardstock Paper
- Scissors
- Glue
Step 1: Take measurements (length and width) of your selected box. Cut your cardstock papers according to the box measurements minus 2cm. This
means that if the box is 10cm x 10cm, your coloured paper should be 8cm x 8cm.
Step 2: Print out your pictures slightly smaller than your cardstock paper. The paper acts as a frame for your picture.
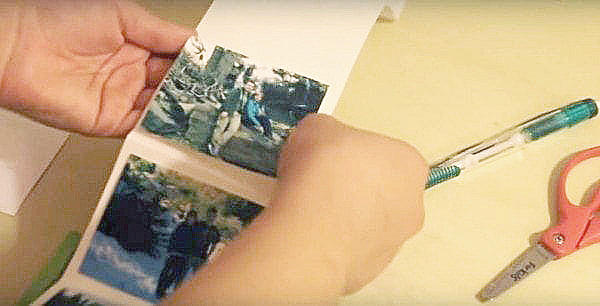
Step 3: After preparing your cardstock paper and pictures, fold your cardstock paper to match the number of pictures you want. Then, paste all your pictures on every section of the cardstock paper (as seen in the picture above).
Step 4: Write something sweet for the receiver behind the every picture!
Step 5: Tape a small paper on the first picture to act as a tab that can be pulled easily.
Step 6: Glue the last picture on the wooden box to secure the pictures, close the box and you are ready to go. You can even decorate the box, by painting it or adding decorations. Let your imagination run wild!
PHOTO COLLAGE NUMBER BOARD
Here’s what you need:
- Cardboard (as big as you want the collage to be)
- Scissors / penknife
- Glue / sticky tape
- Pencil
- Photos or printed pictures
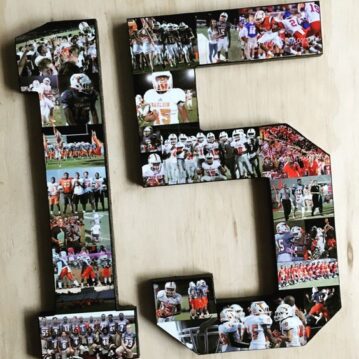
Step 1: Trace out the visual that you want, for example, the number ‘20’ or a flower, onto the cardboard.
Step 2: Align and fit the pictures within the outline trace image. Adjust the photos around until you’re truly satisfied with it. Some of the pictures may need to be trimmed to fit within the trace image.
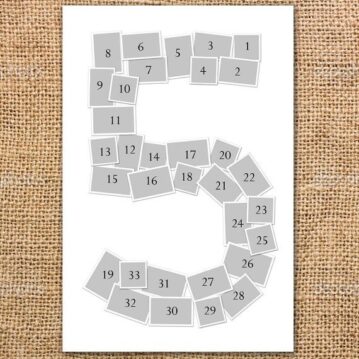
Step 3: Grab your glue and start attaching them onto the cardboard. Here’s a number template for your reference (shown in the picture above). You can find both free and paid templates online.
Step 4: Leave it to dry for a while and you are done!